My personal project is restoring a 1988 2-seat CFM Shadow microlight. Recently, as I was en-route to the Skyleader factory in the Czech Republic, I had the opportunity to visit some Shadow owners in UK.
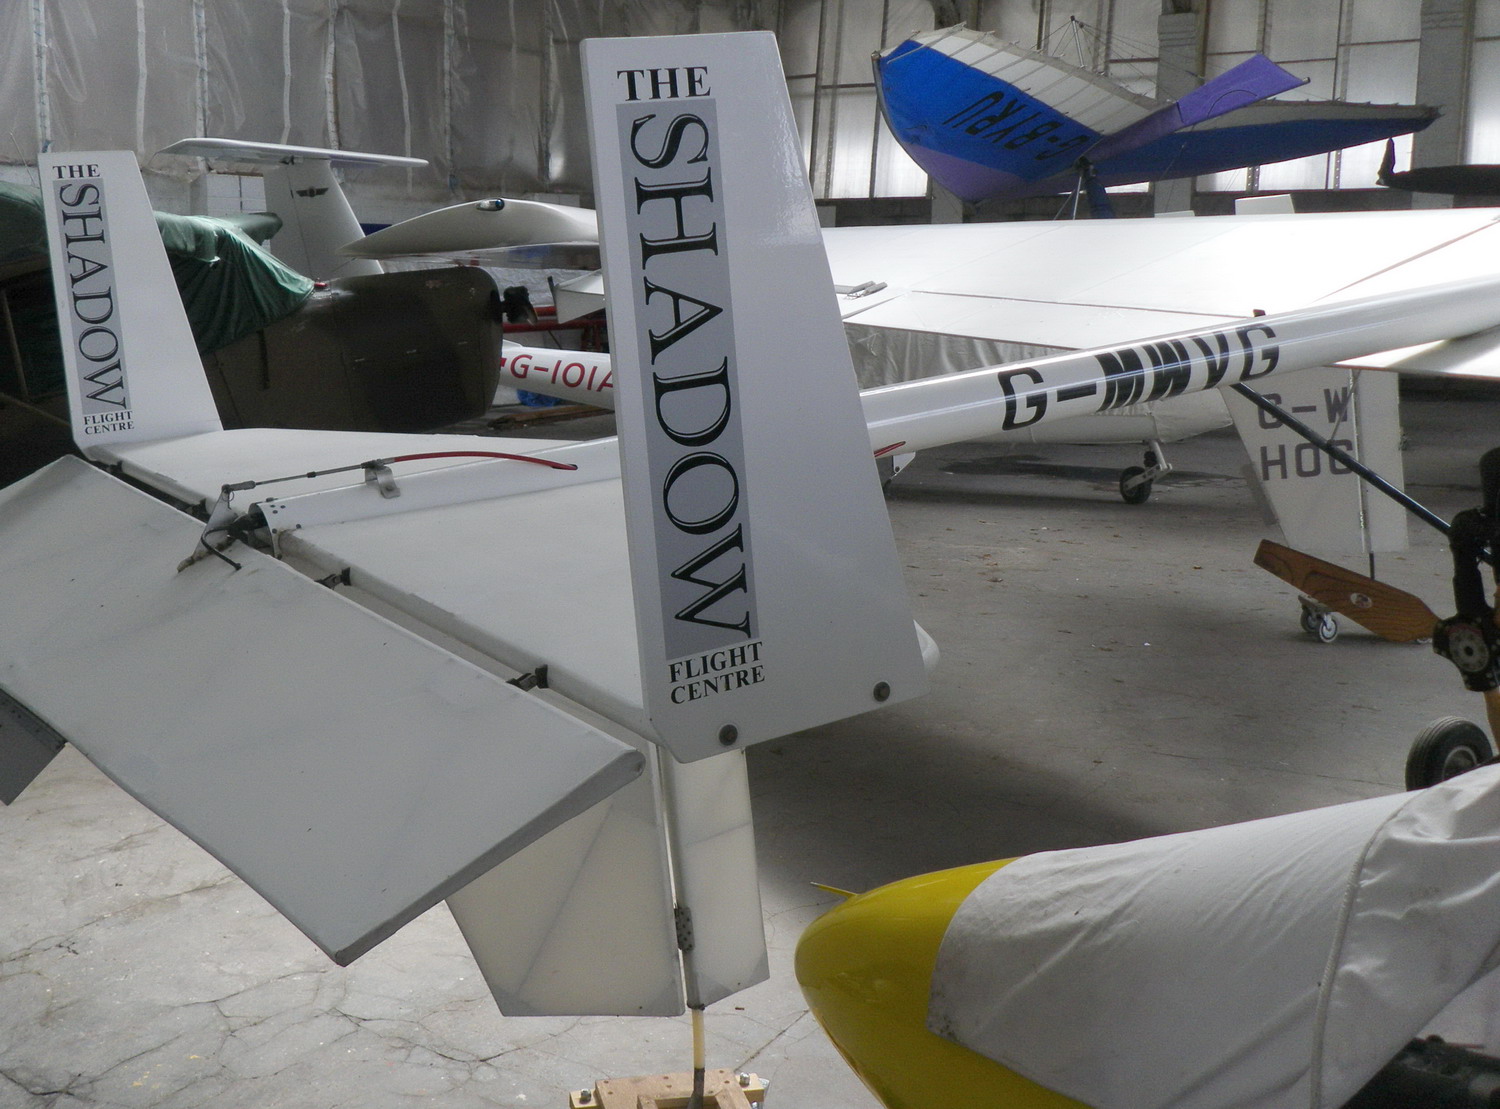
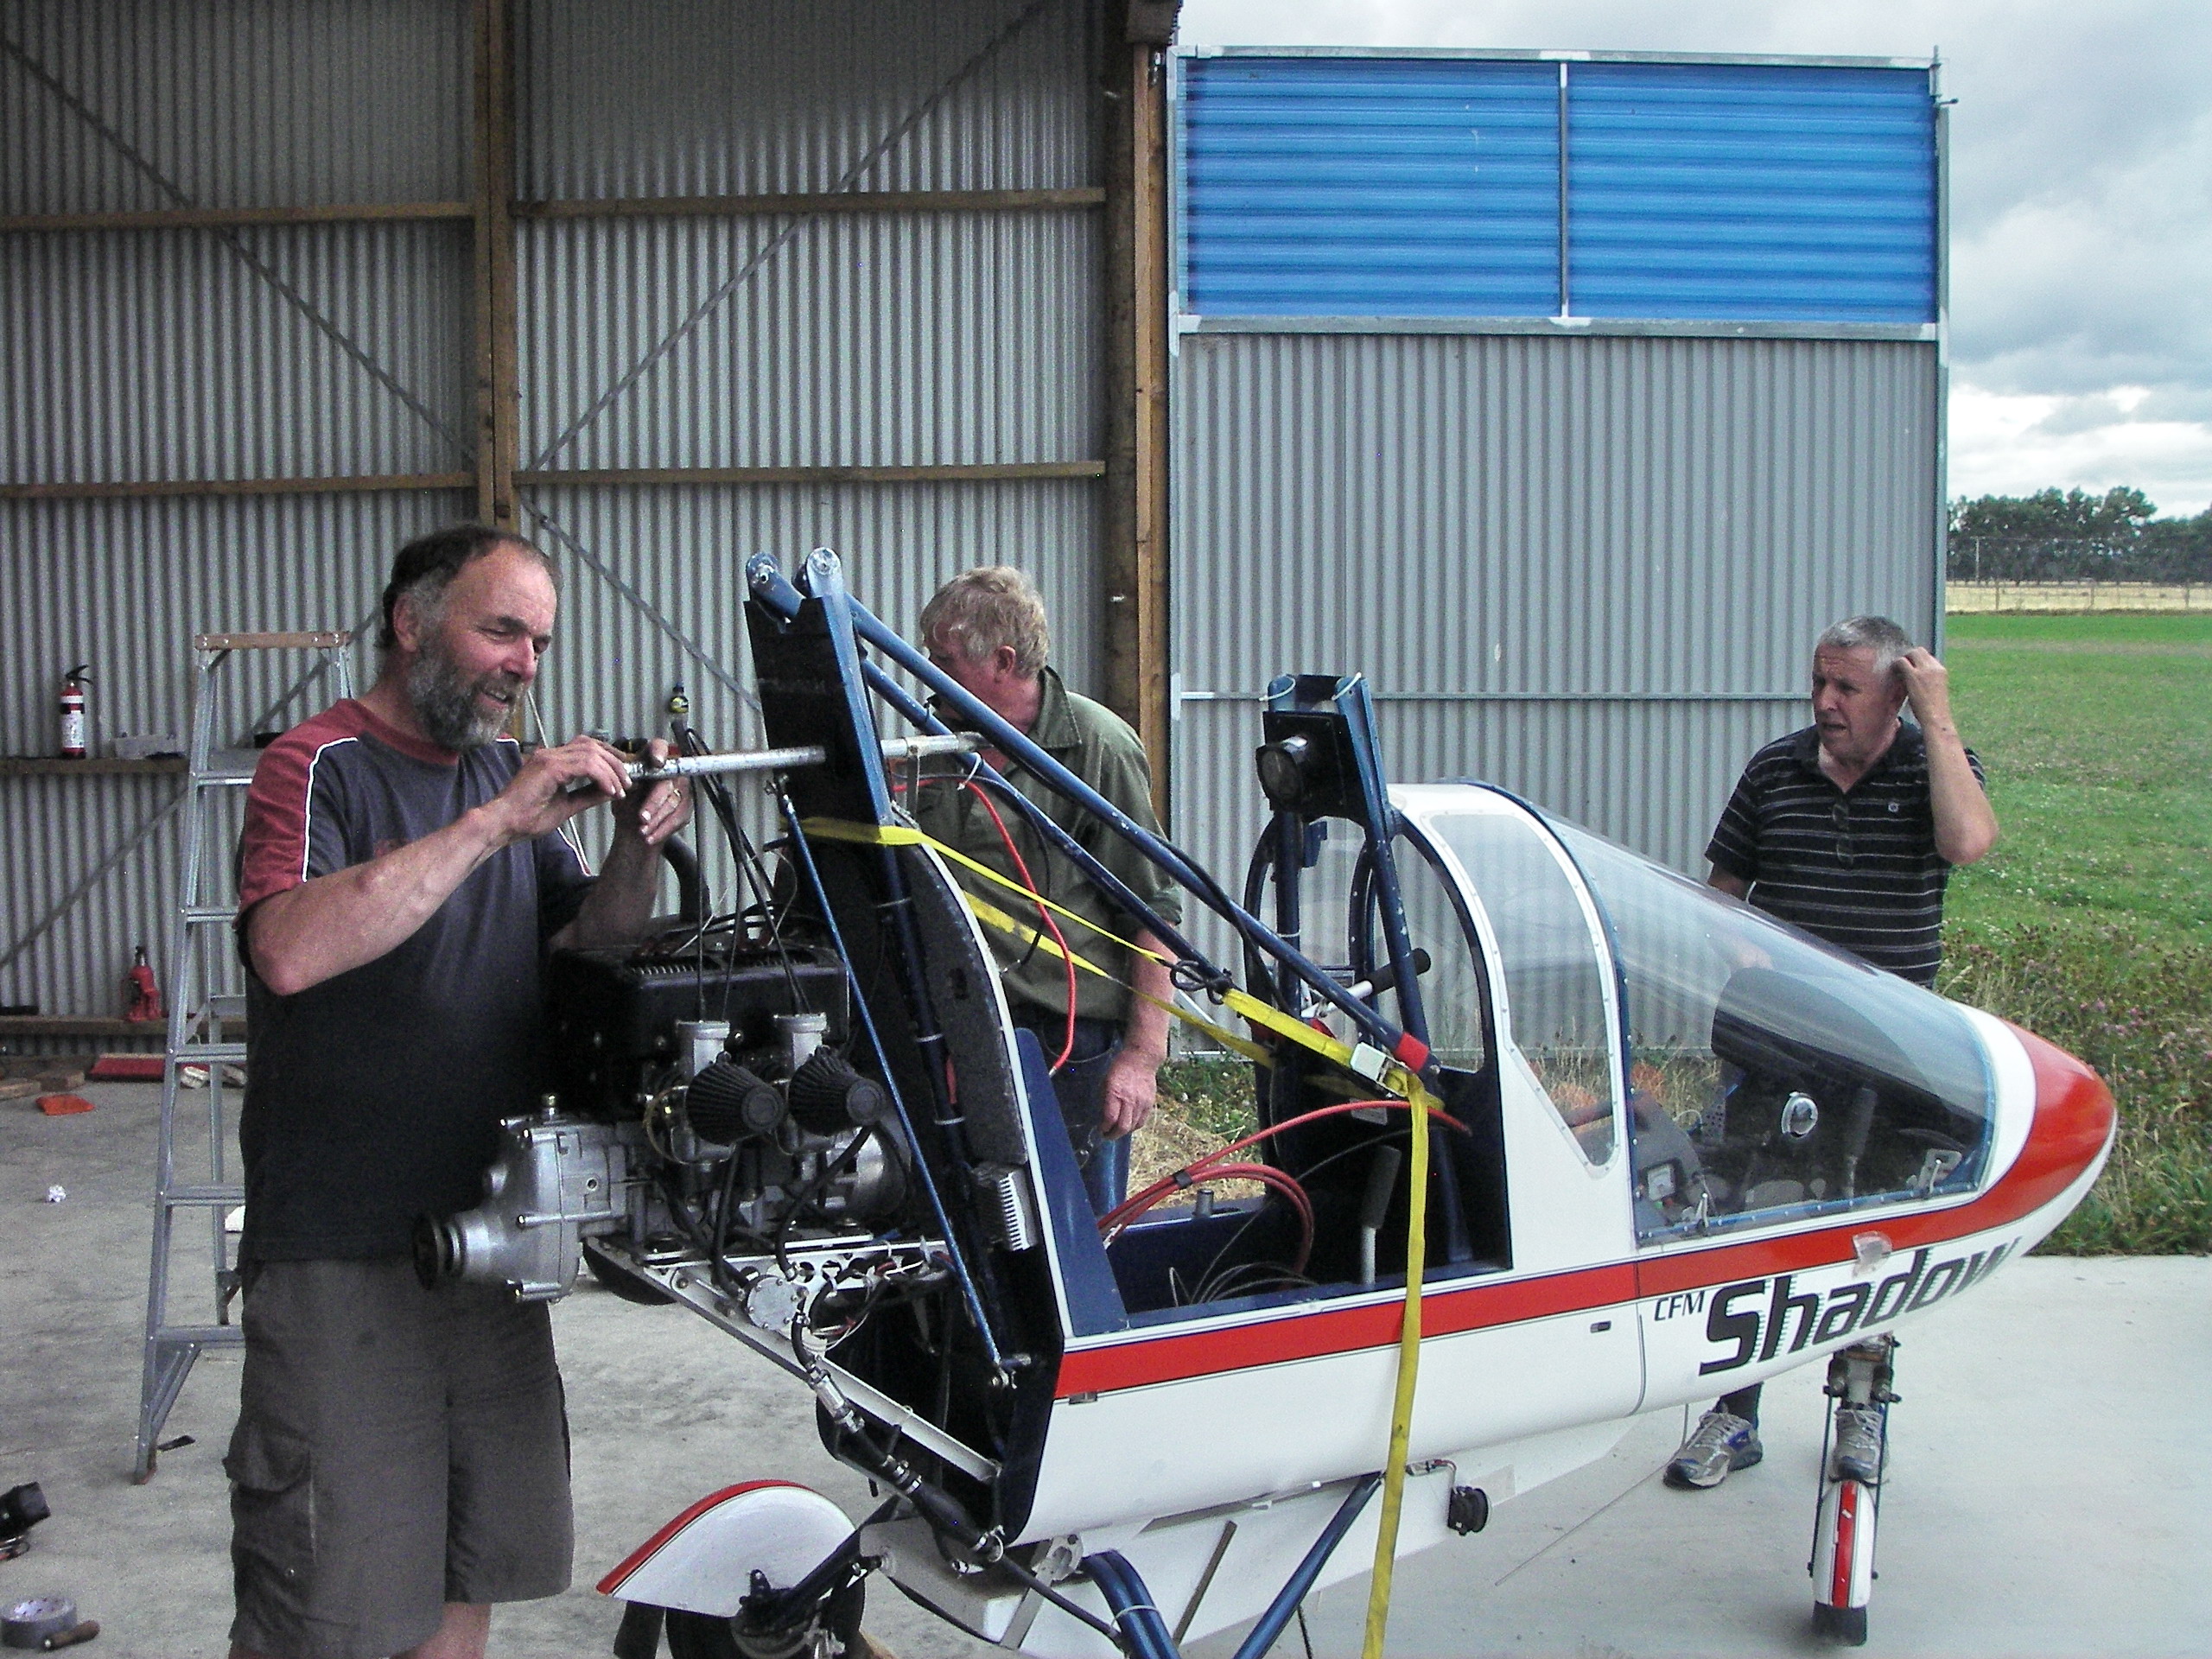
One stop was at the iconic Shadow Flight Centre near Salisbury. Fiona Luckhurst and Raymond Proost host a myriad of C-D and Streak variants in their hangar at the Old Sarum airfield. They have built up a vast knowledge of the CFM Shadow series, having operated a flight school for many years and repaired/maintained a lot of these classic microlights.
Raymond was kind enough to show me some of their unique equipment. The ‘historic’ red boom jig (for accurately making replacement Shadow or Streak booms) allowed me to definitively solve the mystery of the correct tailplane incidences on the 582-powered Shadow D-D and Streak models. Raymond also has a nifty pattern for getting the nose leg wires correct. I inspected a brand-new Crosbie undercarriage – it was reassuring to find that the mods I have done to strengthen the undercarriage of my Shadow in New Zealand are along very similar lines.
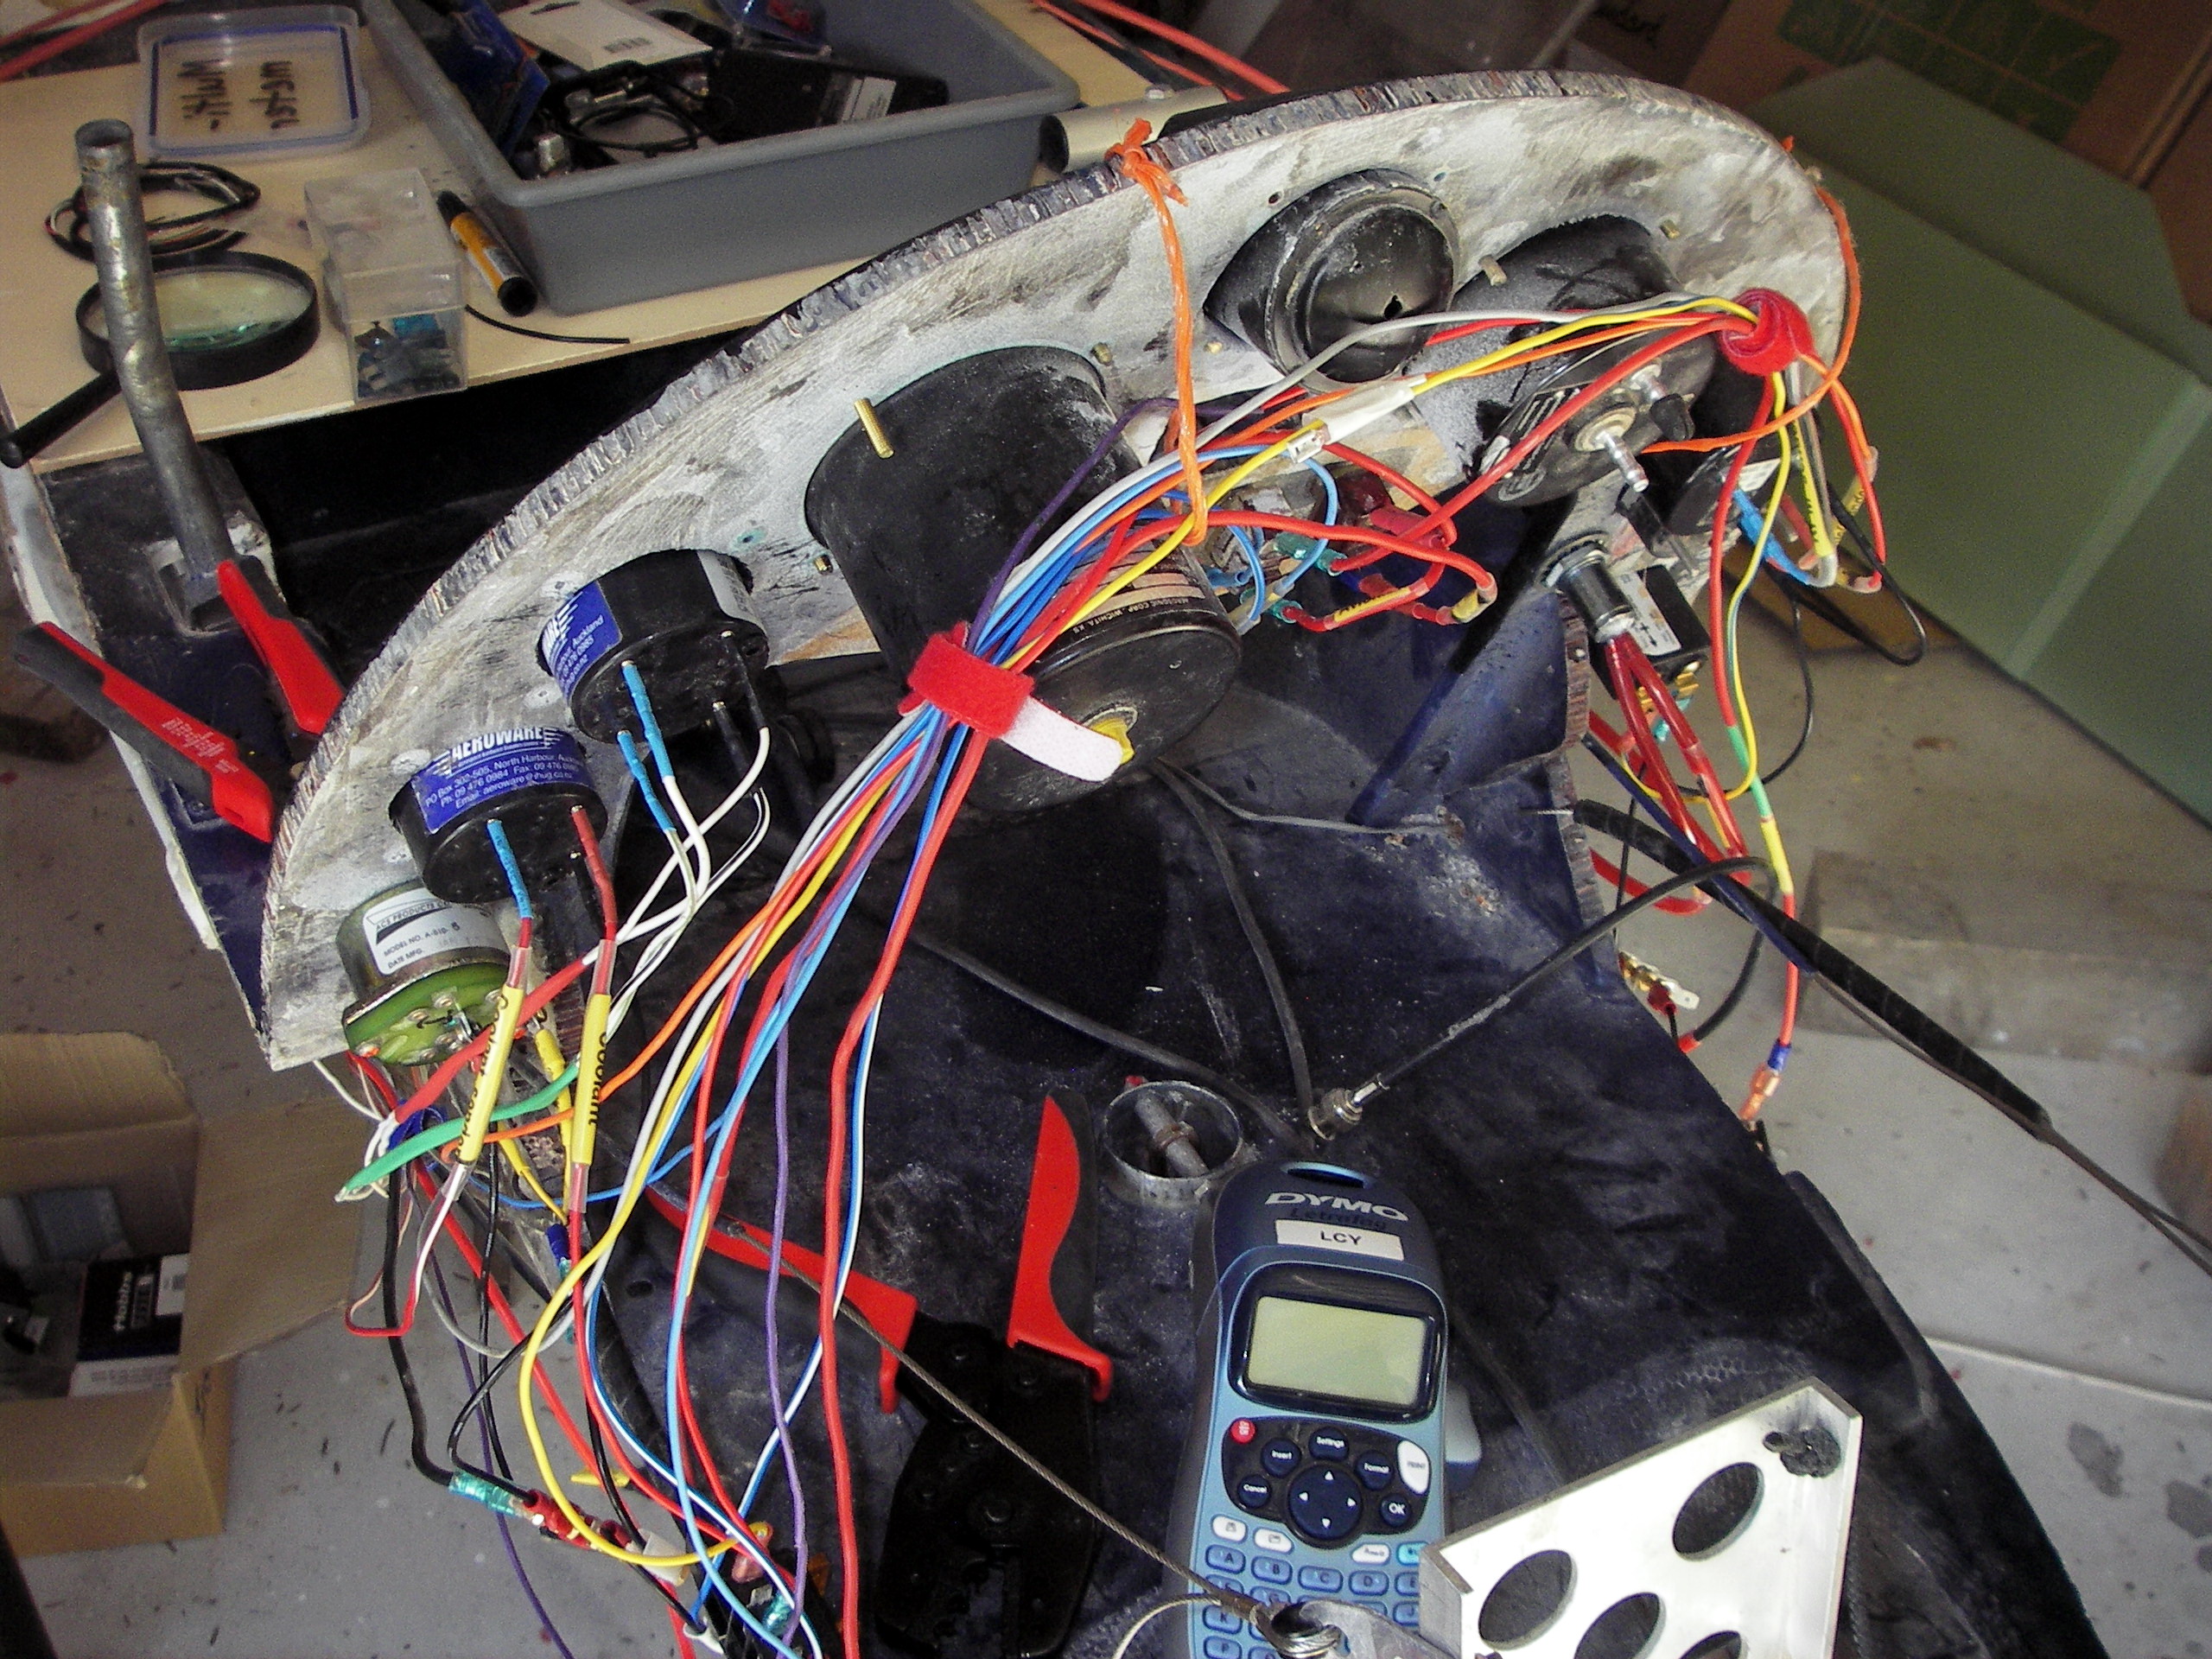
Wiring up electrical systems gives me the ‘heebie jeebies’ – I’m never very sure whether the sneaky little electrons will go where I want them to go or if the wires will suffer a melt-down (thereby letting ‘the smoke get out’ of them).
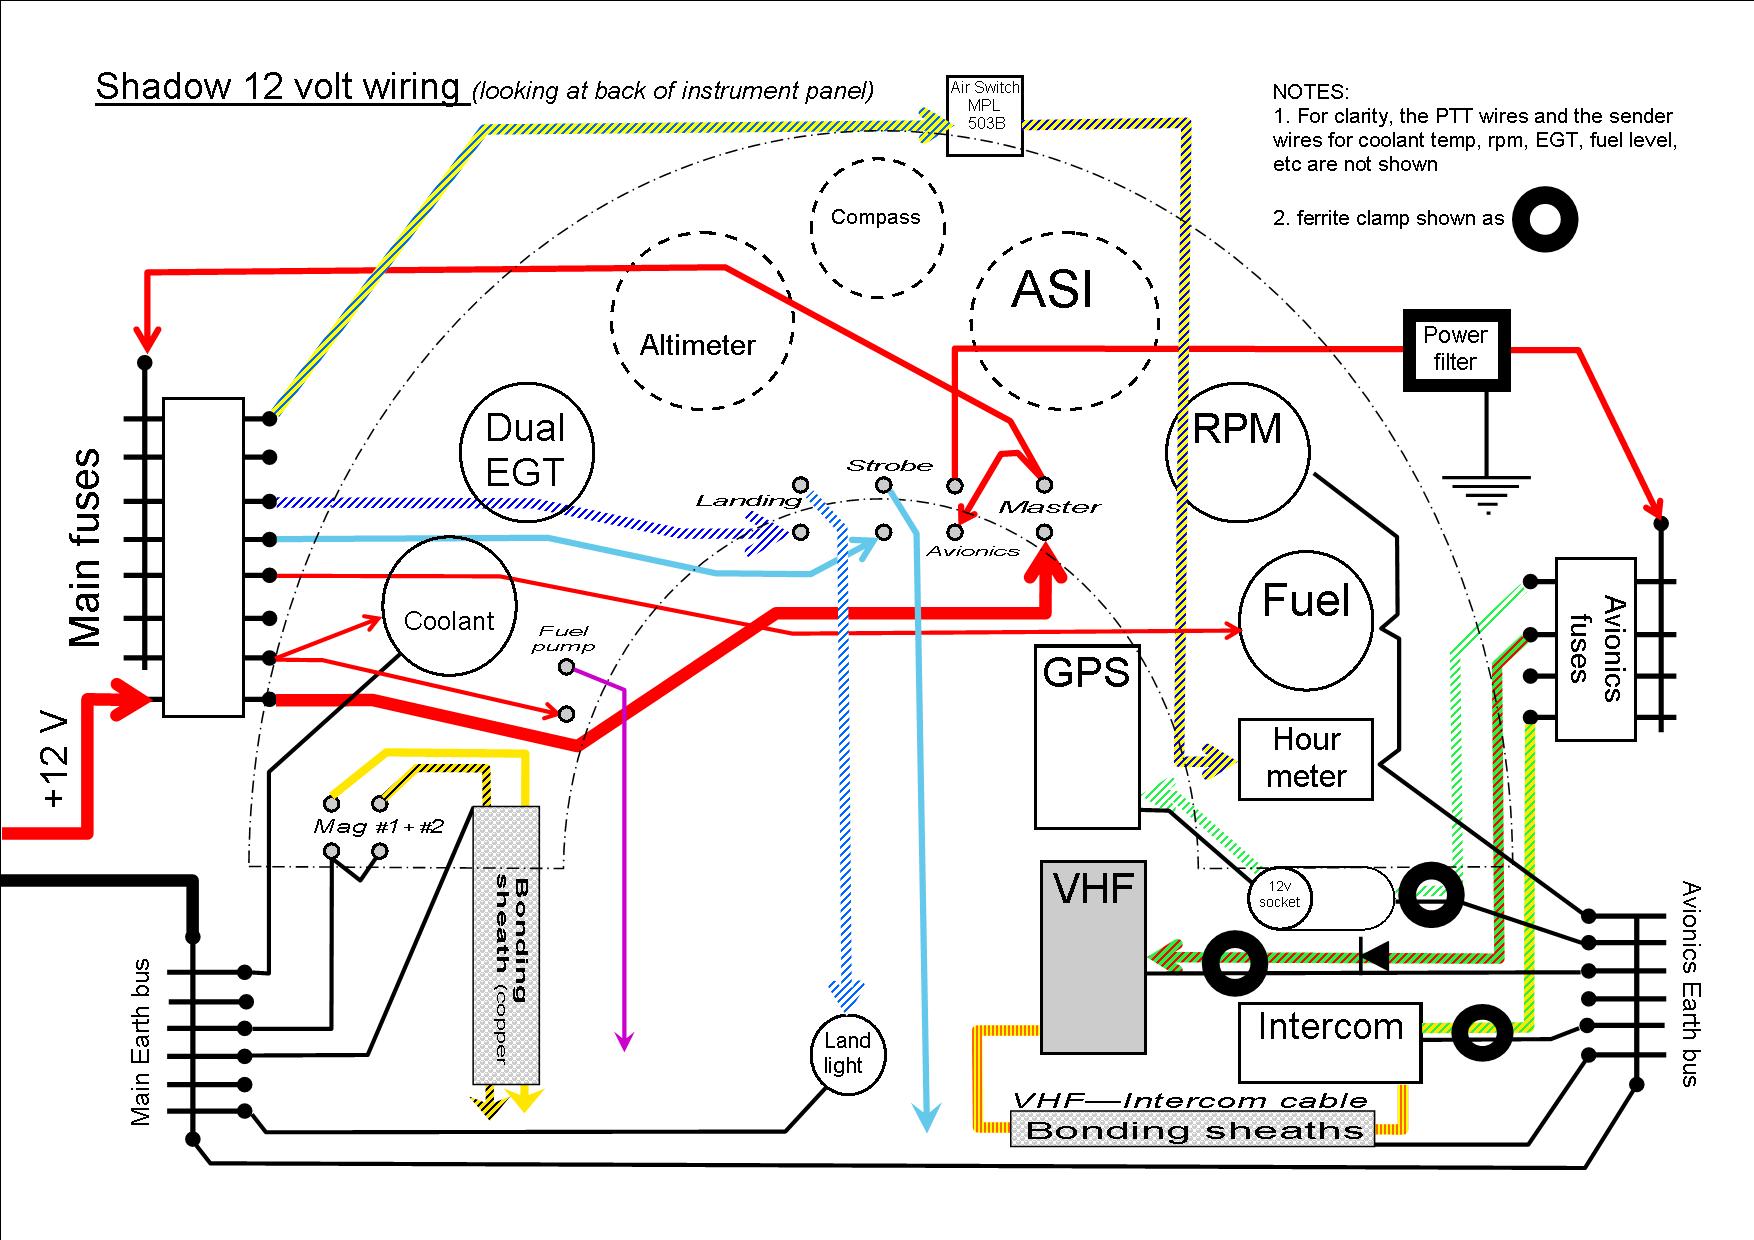
I’d already spent hours on the computer working on wiring diagrams – colour-coded wires, switch banks, earth buses, filtered avionic supply, etc. That’s all very nice, but eventually someone has to cut
actual wires and crimp on actual connectors. I’ve sat at the nose of the Shadow for quite a few hours tentatively cutting, labelling and crimping. After the first session, I’d done five wires, and only made two mistakes! One was too short. Another had the wrong label.
The final result is OK I think, but needs a better way to support the bundle of wires.
Now completed the covering of the wing’s centre section.
With the help of my brother-in-law and his wife, we flipped the fuselage/wing centre upside down (and carried it back into the workshop) so I could work on the underside of the wing stub. It was very easy to cover it with lightweight Poly-Fiber fabric and then gently heat shrink it smooth. I was pretty pleased with the zipped access panels that I’d sewn in before gluing the fabric on.
The brushed-on sealing coat was Wattyl “Solagard Gloss” water-based roof paint (with Floetrol conditioner) thinned with BarsBugs. This flows across and through the weave, gripping the polyester fibres much better than conventional fabric sealers. Next were several sprayed coats of Solagard Gloss/Floetrol thinned with water.
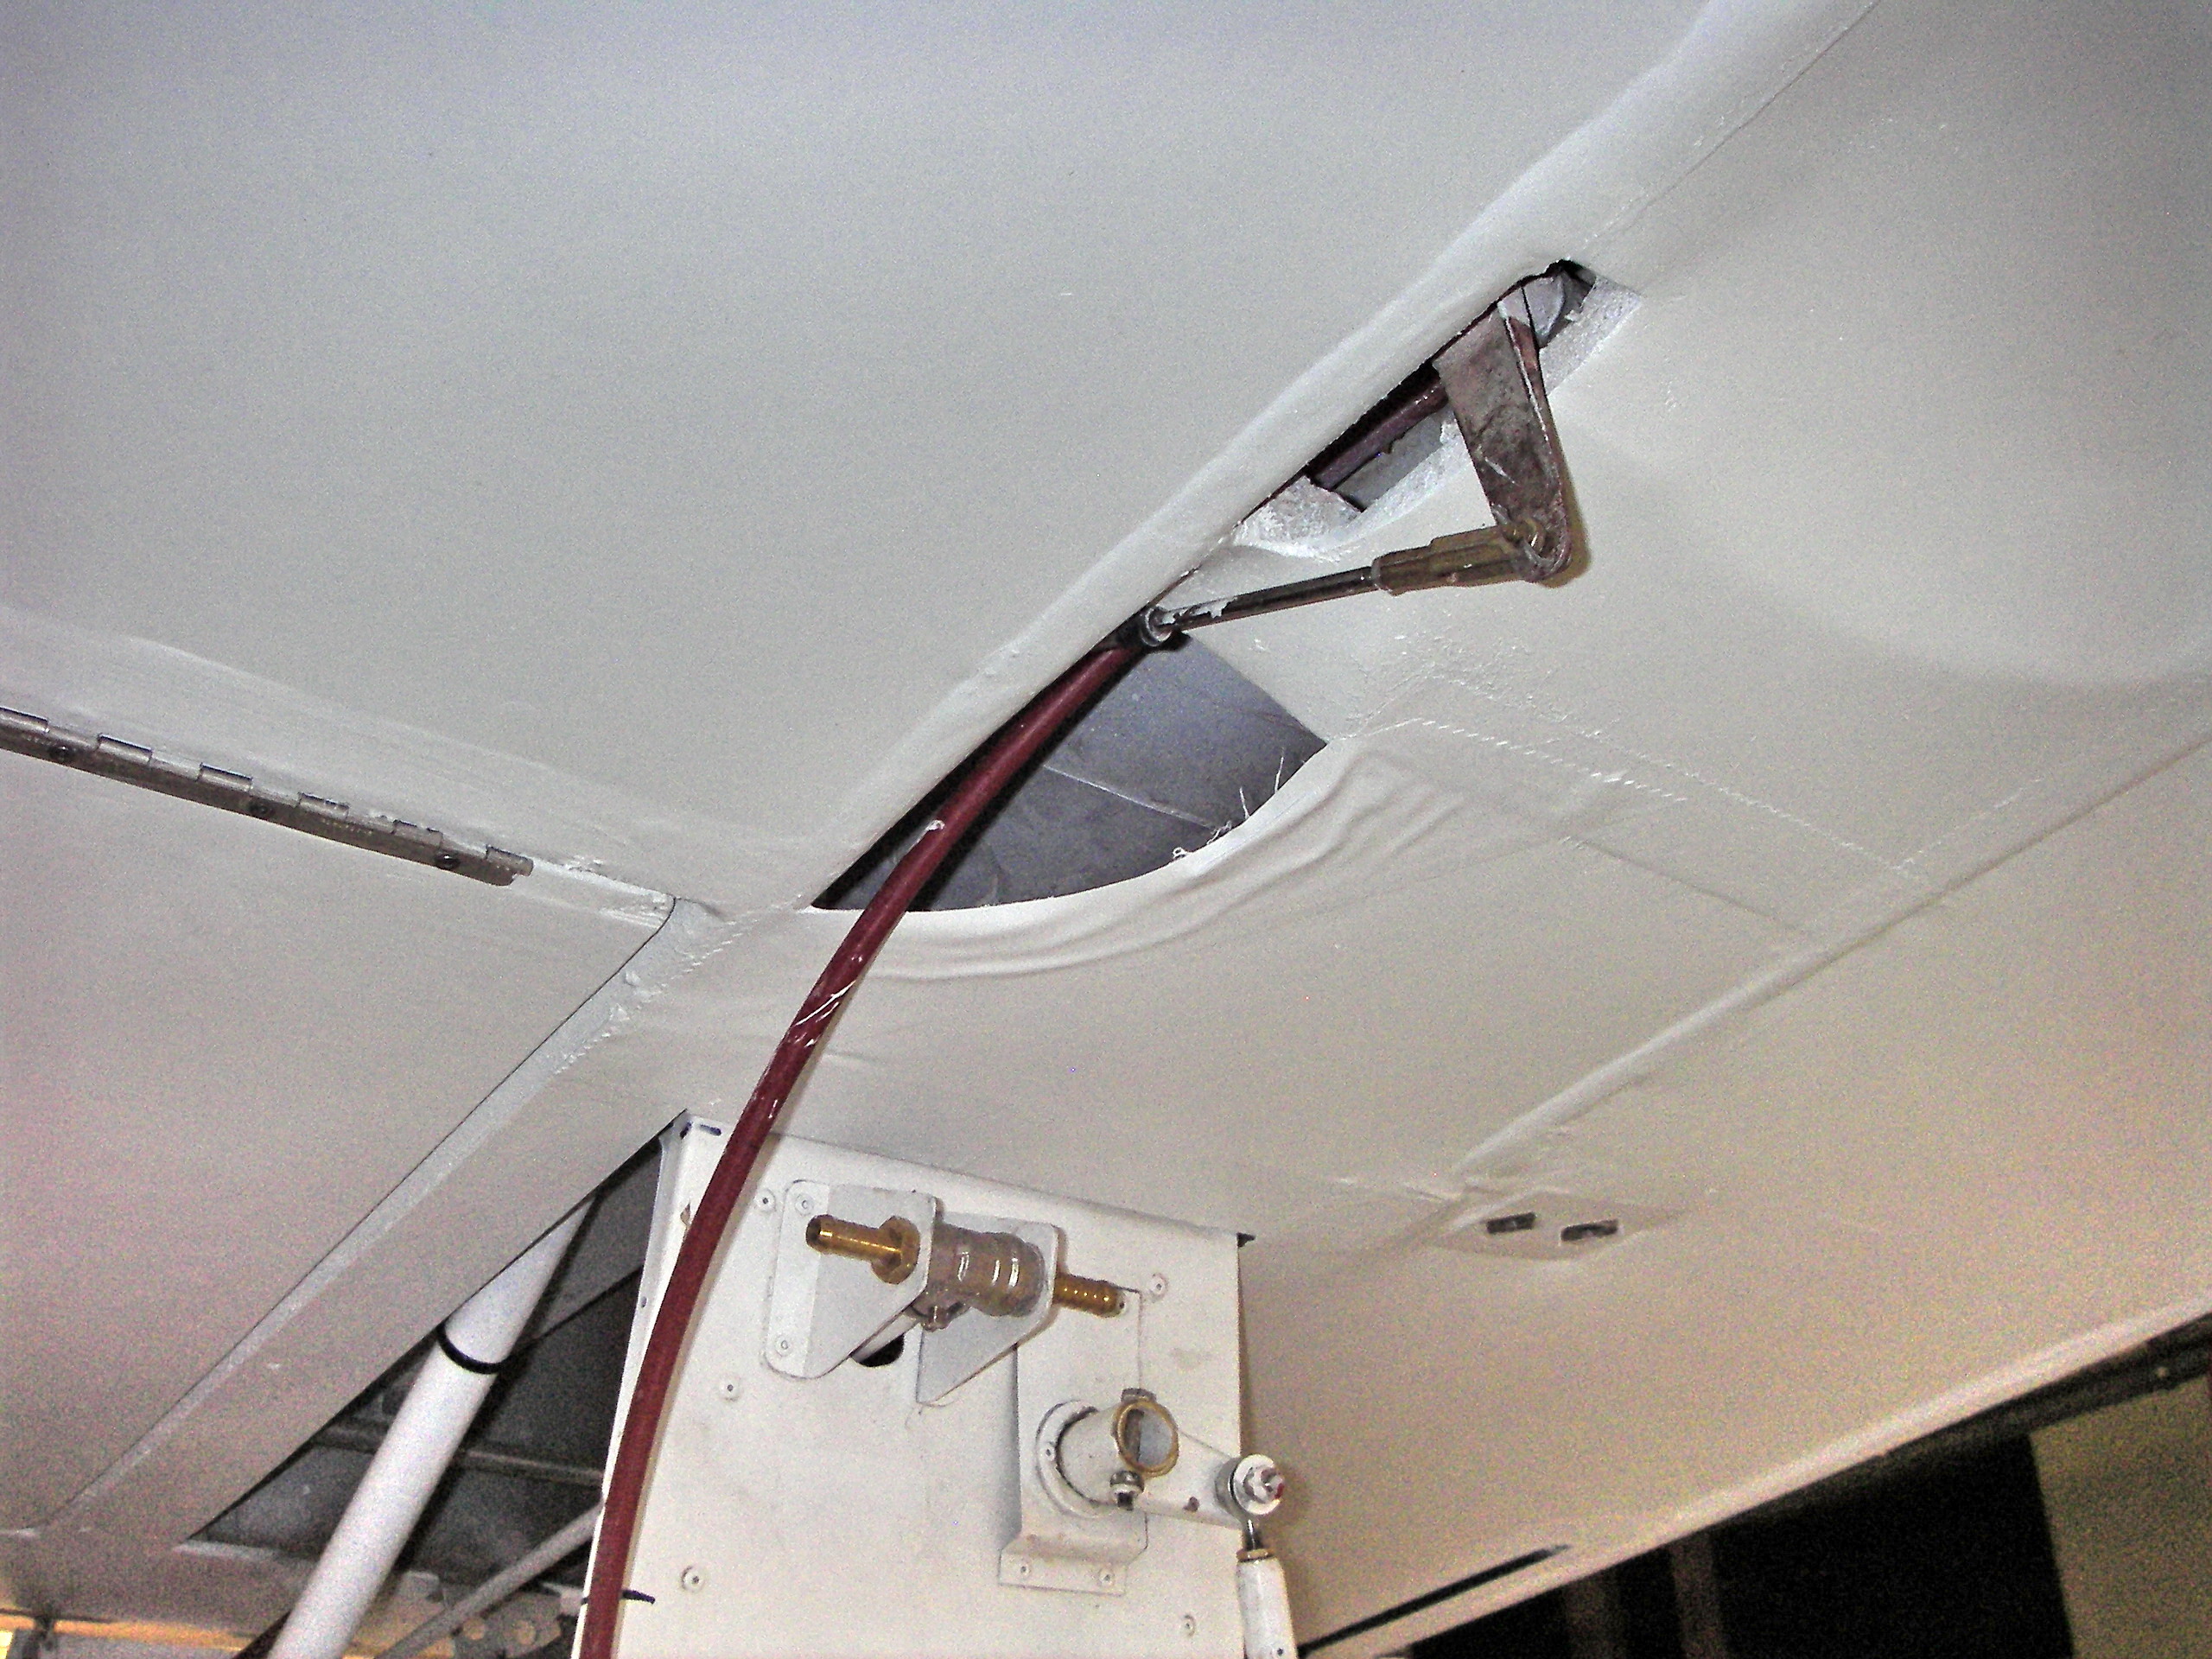
My brother and I carried the inverted fuselage/wing centre out of the workshop and flipped it back onto its wheels. Then, I could cover the top surface of the wing’s centre section. It took some ingenuity to sew and glue fabric shelves along each side of the tail boom, so that I could eliminate the foam shapes that normally surround the boom as it exits the centre section.
I also fitted the underwing luggage locker. It’s a hinged divinycell tub, which can hold a sleeping bag and small tent. In the open position it give easy access for connecting the port-side aileron pushrod. When its closed the luggage is prevented from fouling the pushrod. The starboard-side aileron pushrod is accessed thru the zips mentioned above. There is a 28 litre fuel tank above and aft of the pushrod, which more than doubles the Shadow’s range.
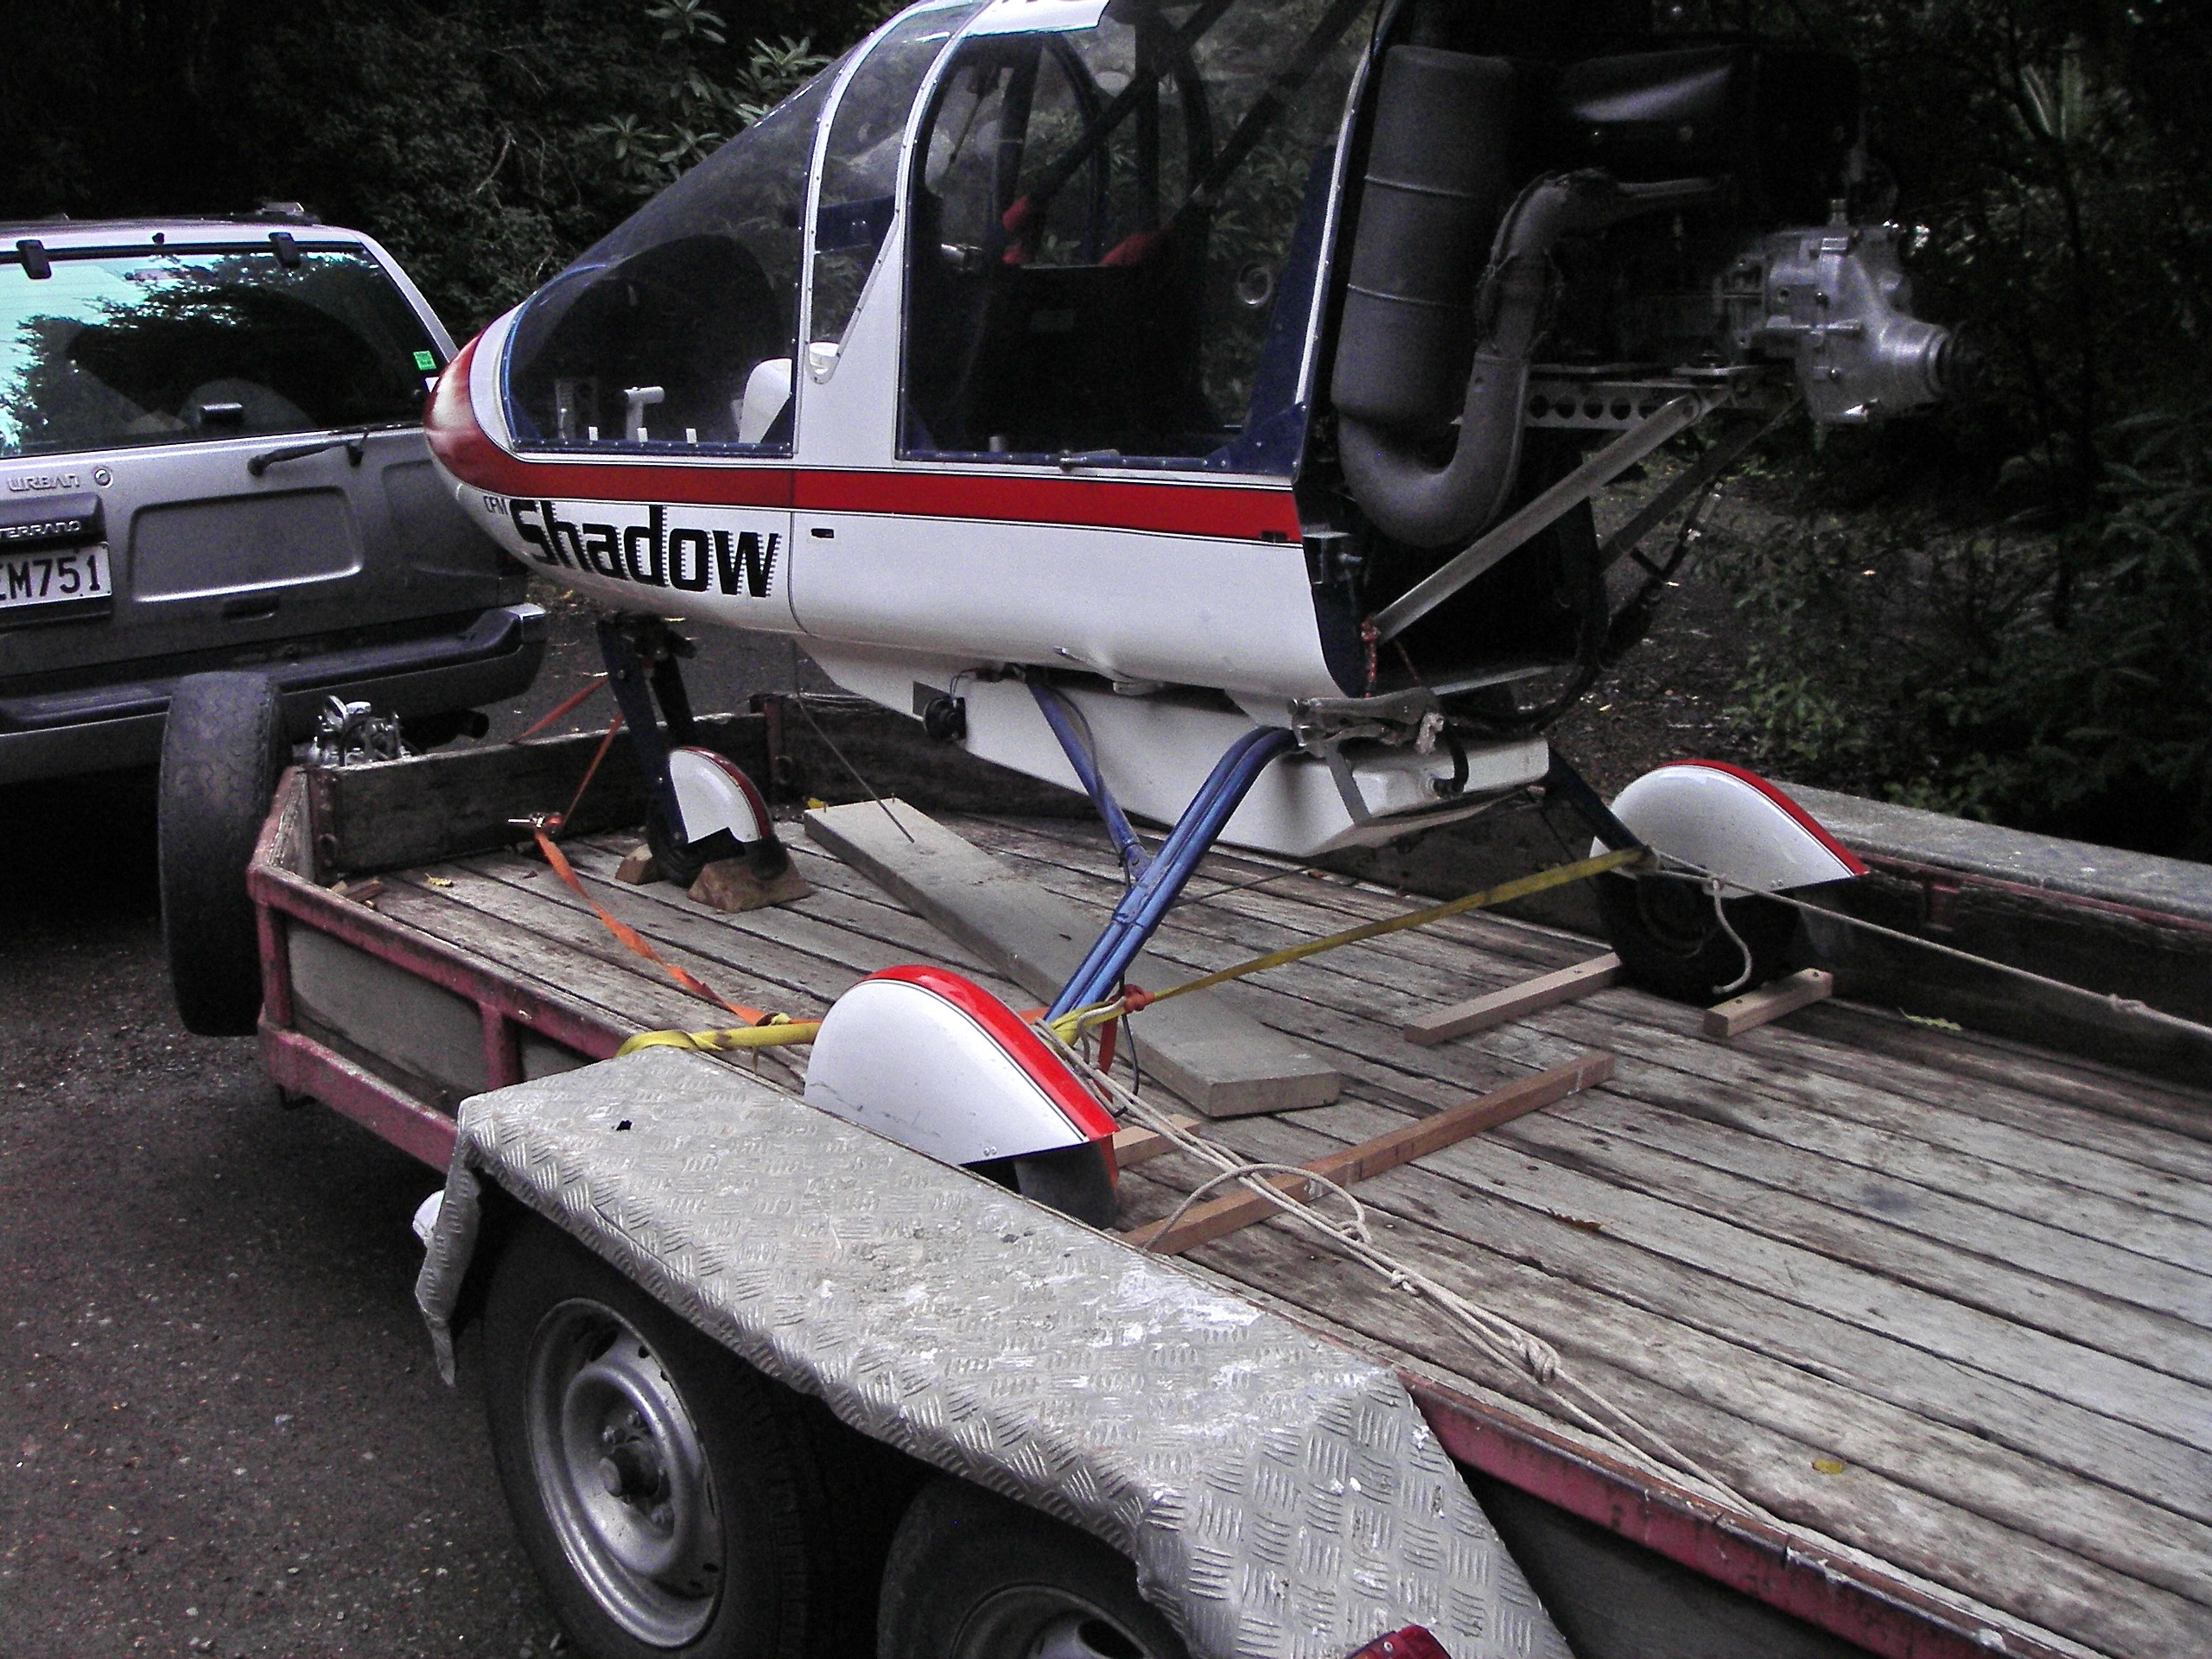
Today I wheeled the Shadow out of the workshop and took some photos to show progress on my re-build. It’s looking like an aircraft again.
It’s been a satisfying couple of days. Yesterday I’d attached the wing centre section and tail boom to the fuselage. Obviously the undercarriage had been mounted underneath to hold it off the ground.
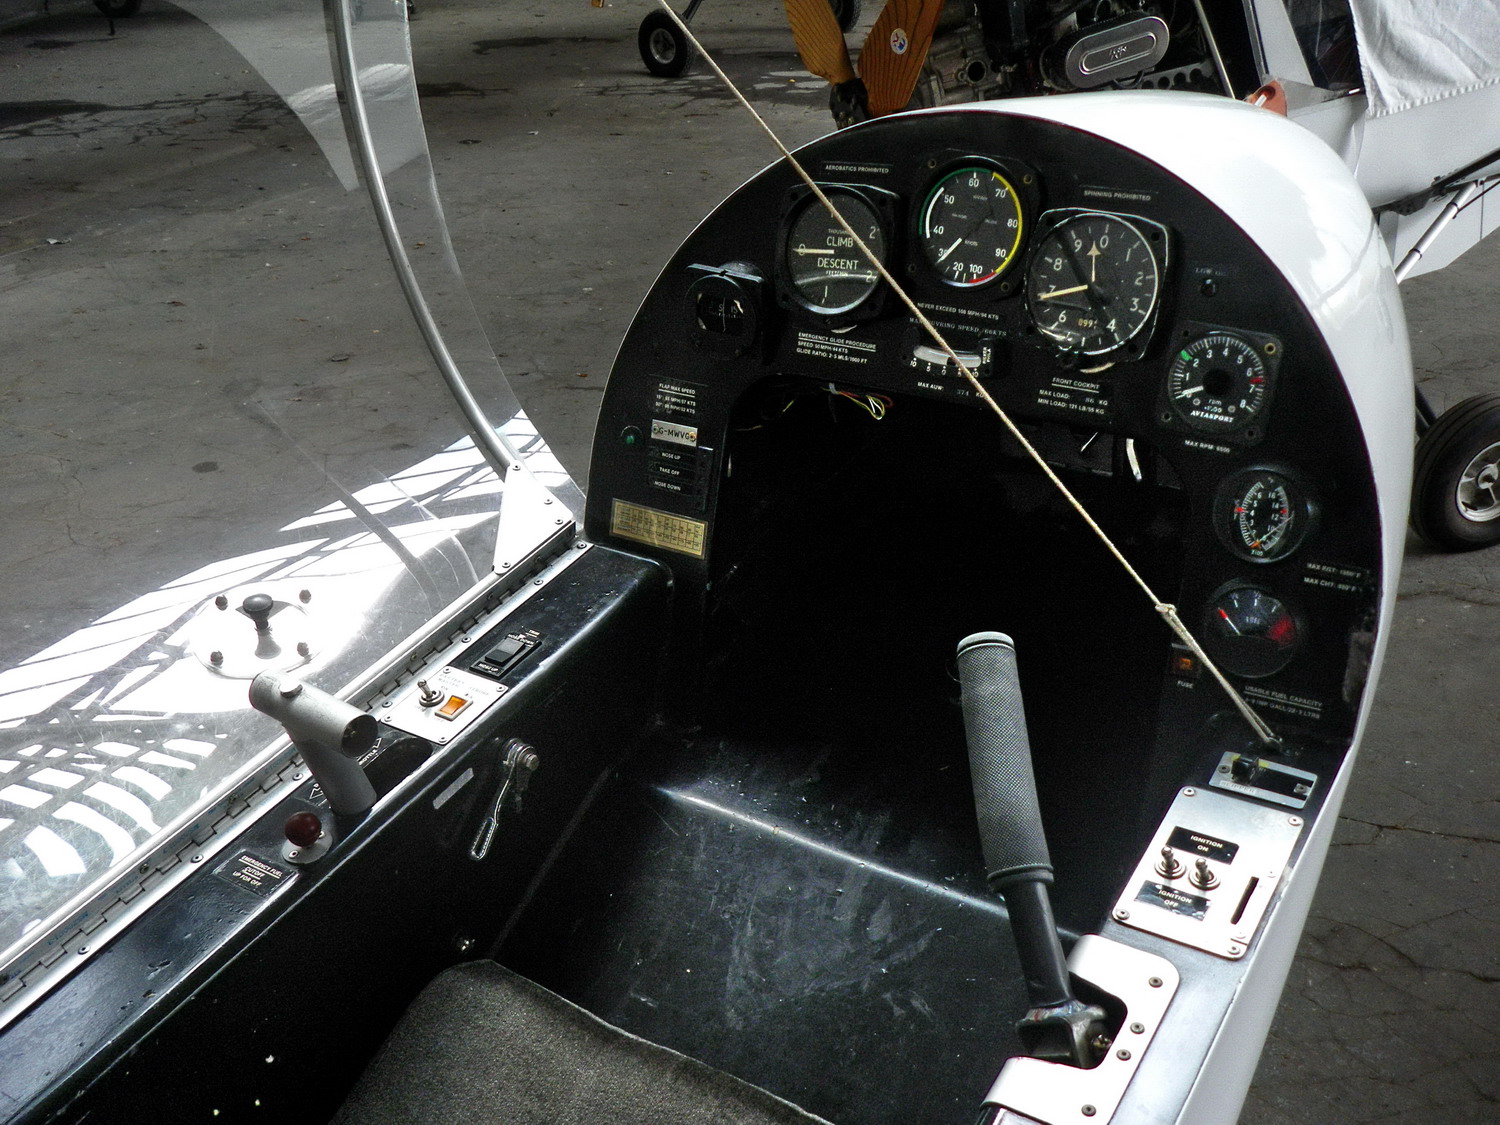
Over the past week I’ve been able to tick off a whole bunch of tasks from my list, including assembling the polyurethane flexi-rod tail skid, mounting the fuel transfer valve with its on/off control rod, crimping the limit wires for the rudder pedals, nose-leg suspension and flap lever. In addition, I have sprayed the instrument panel black, made the polycarbonate side windows and finished sanding the leading edge of the wing centre section.
Very pleasing to see this amount of progress in a week.
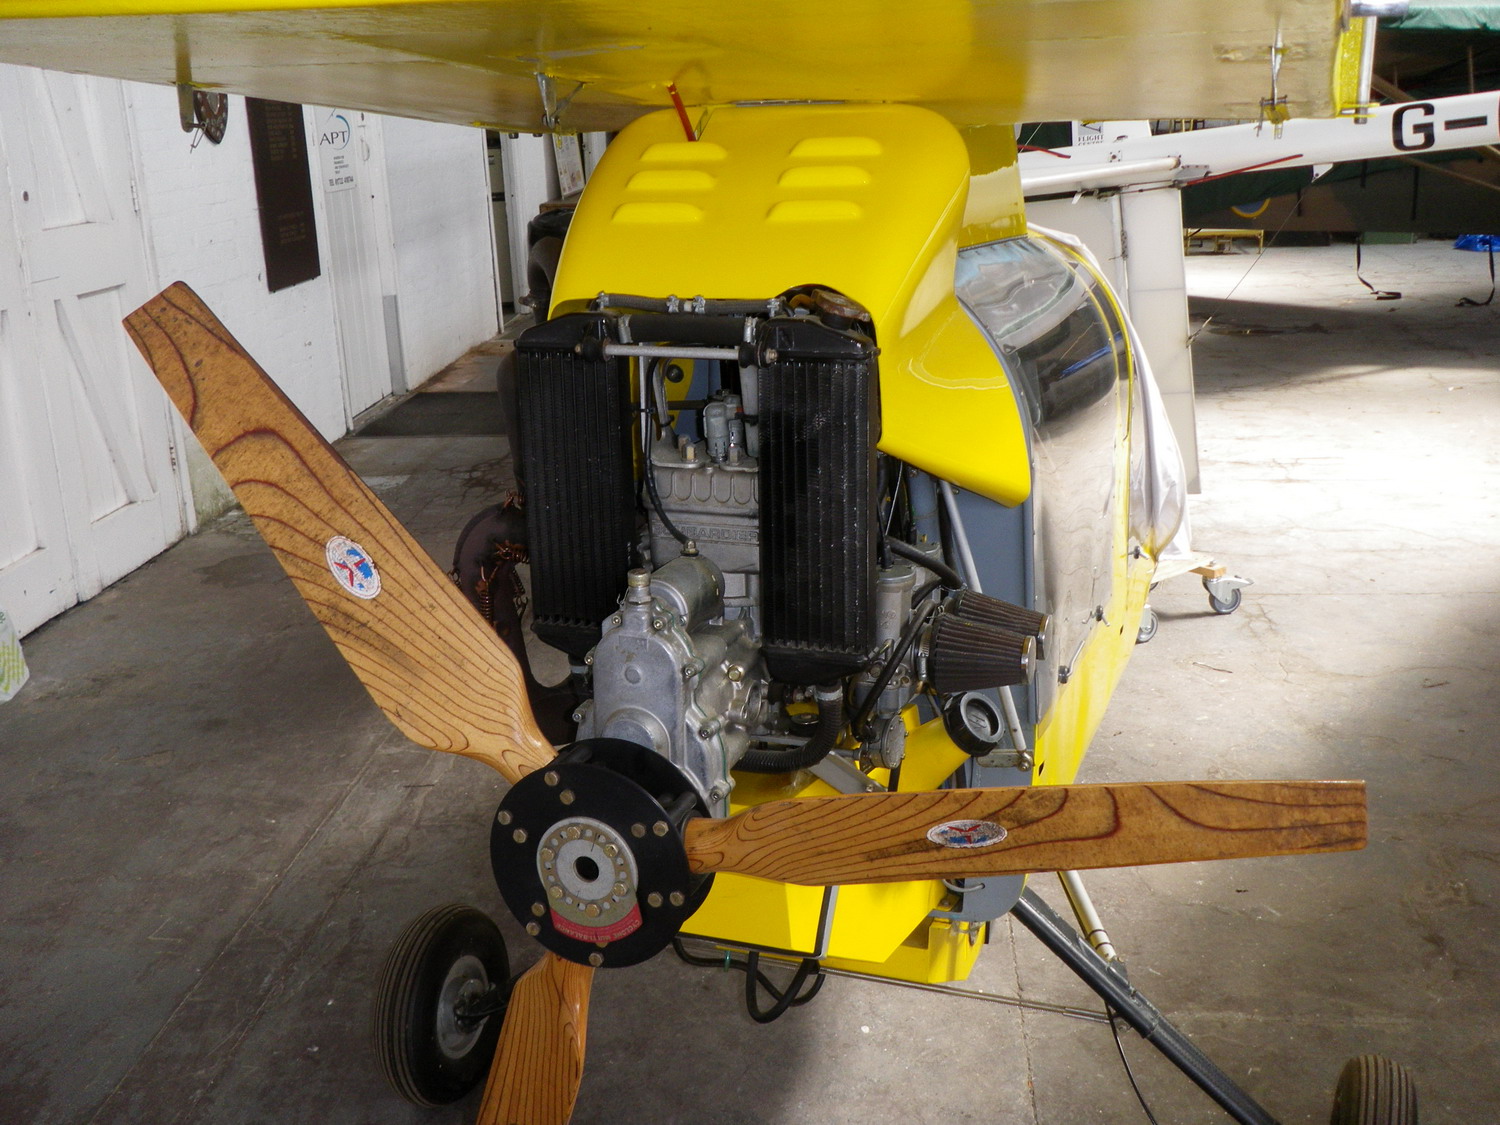
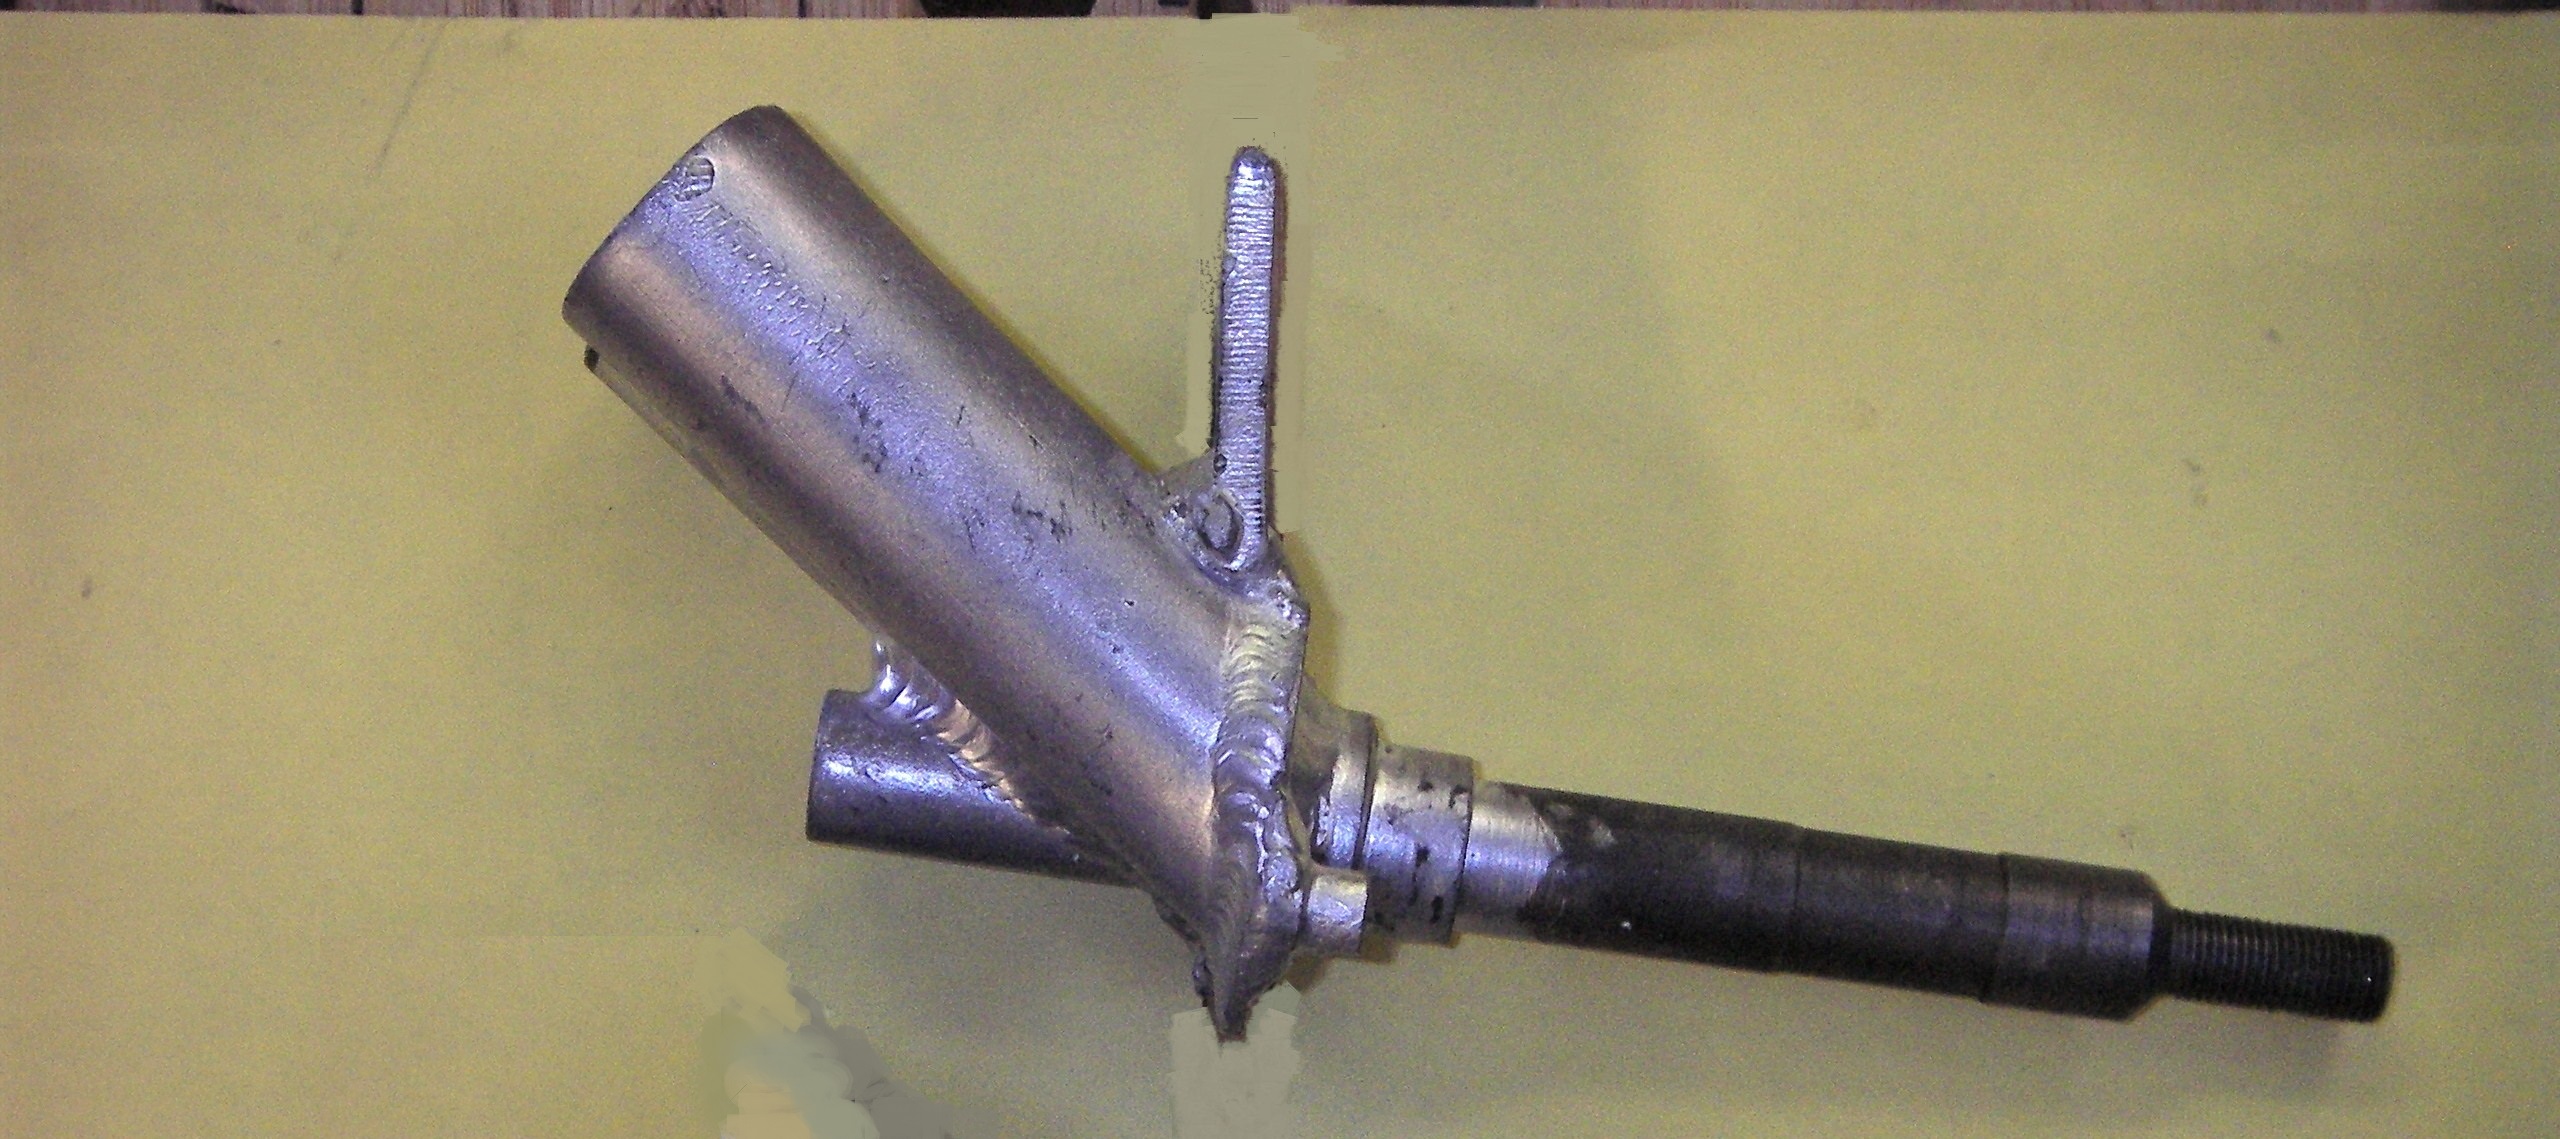
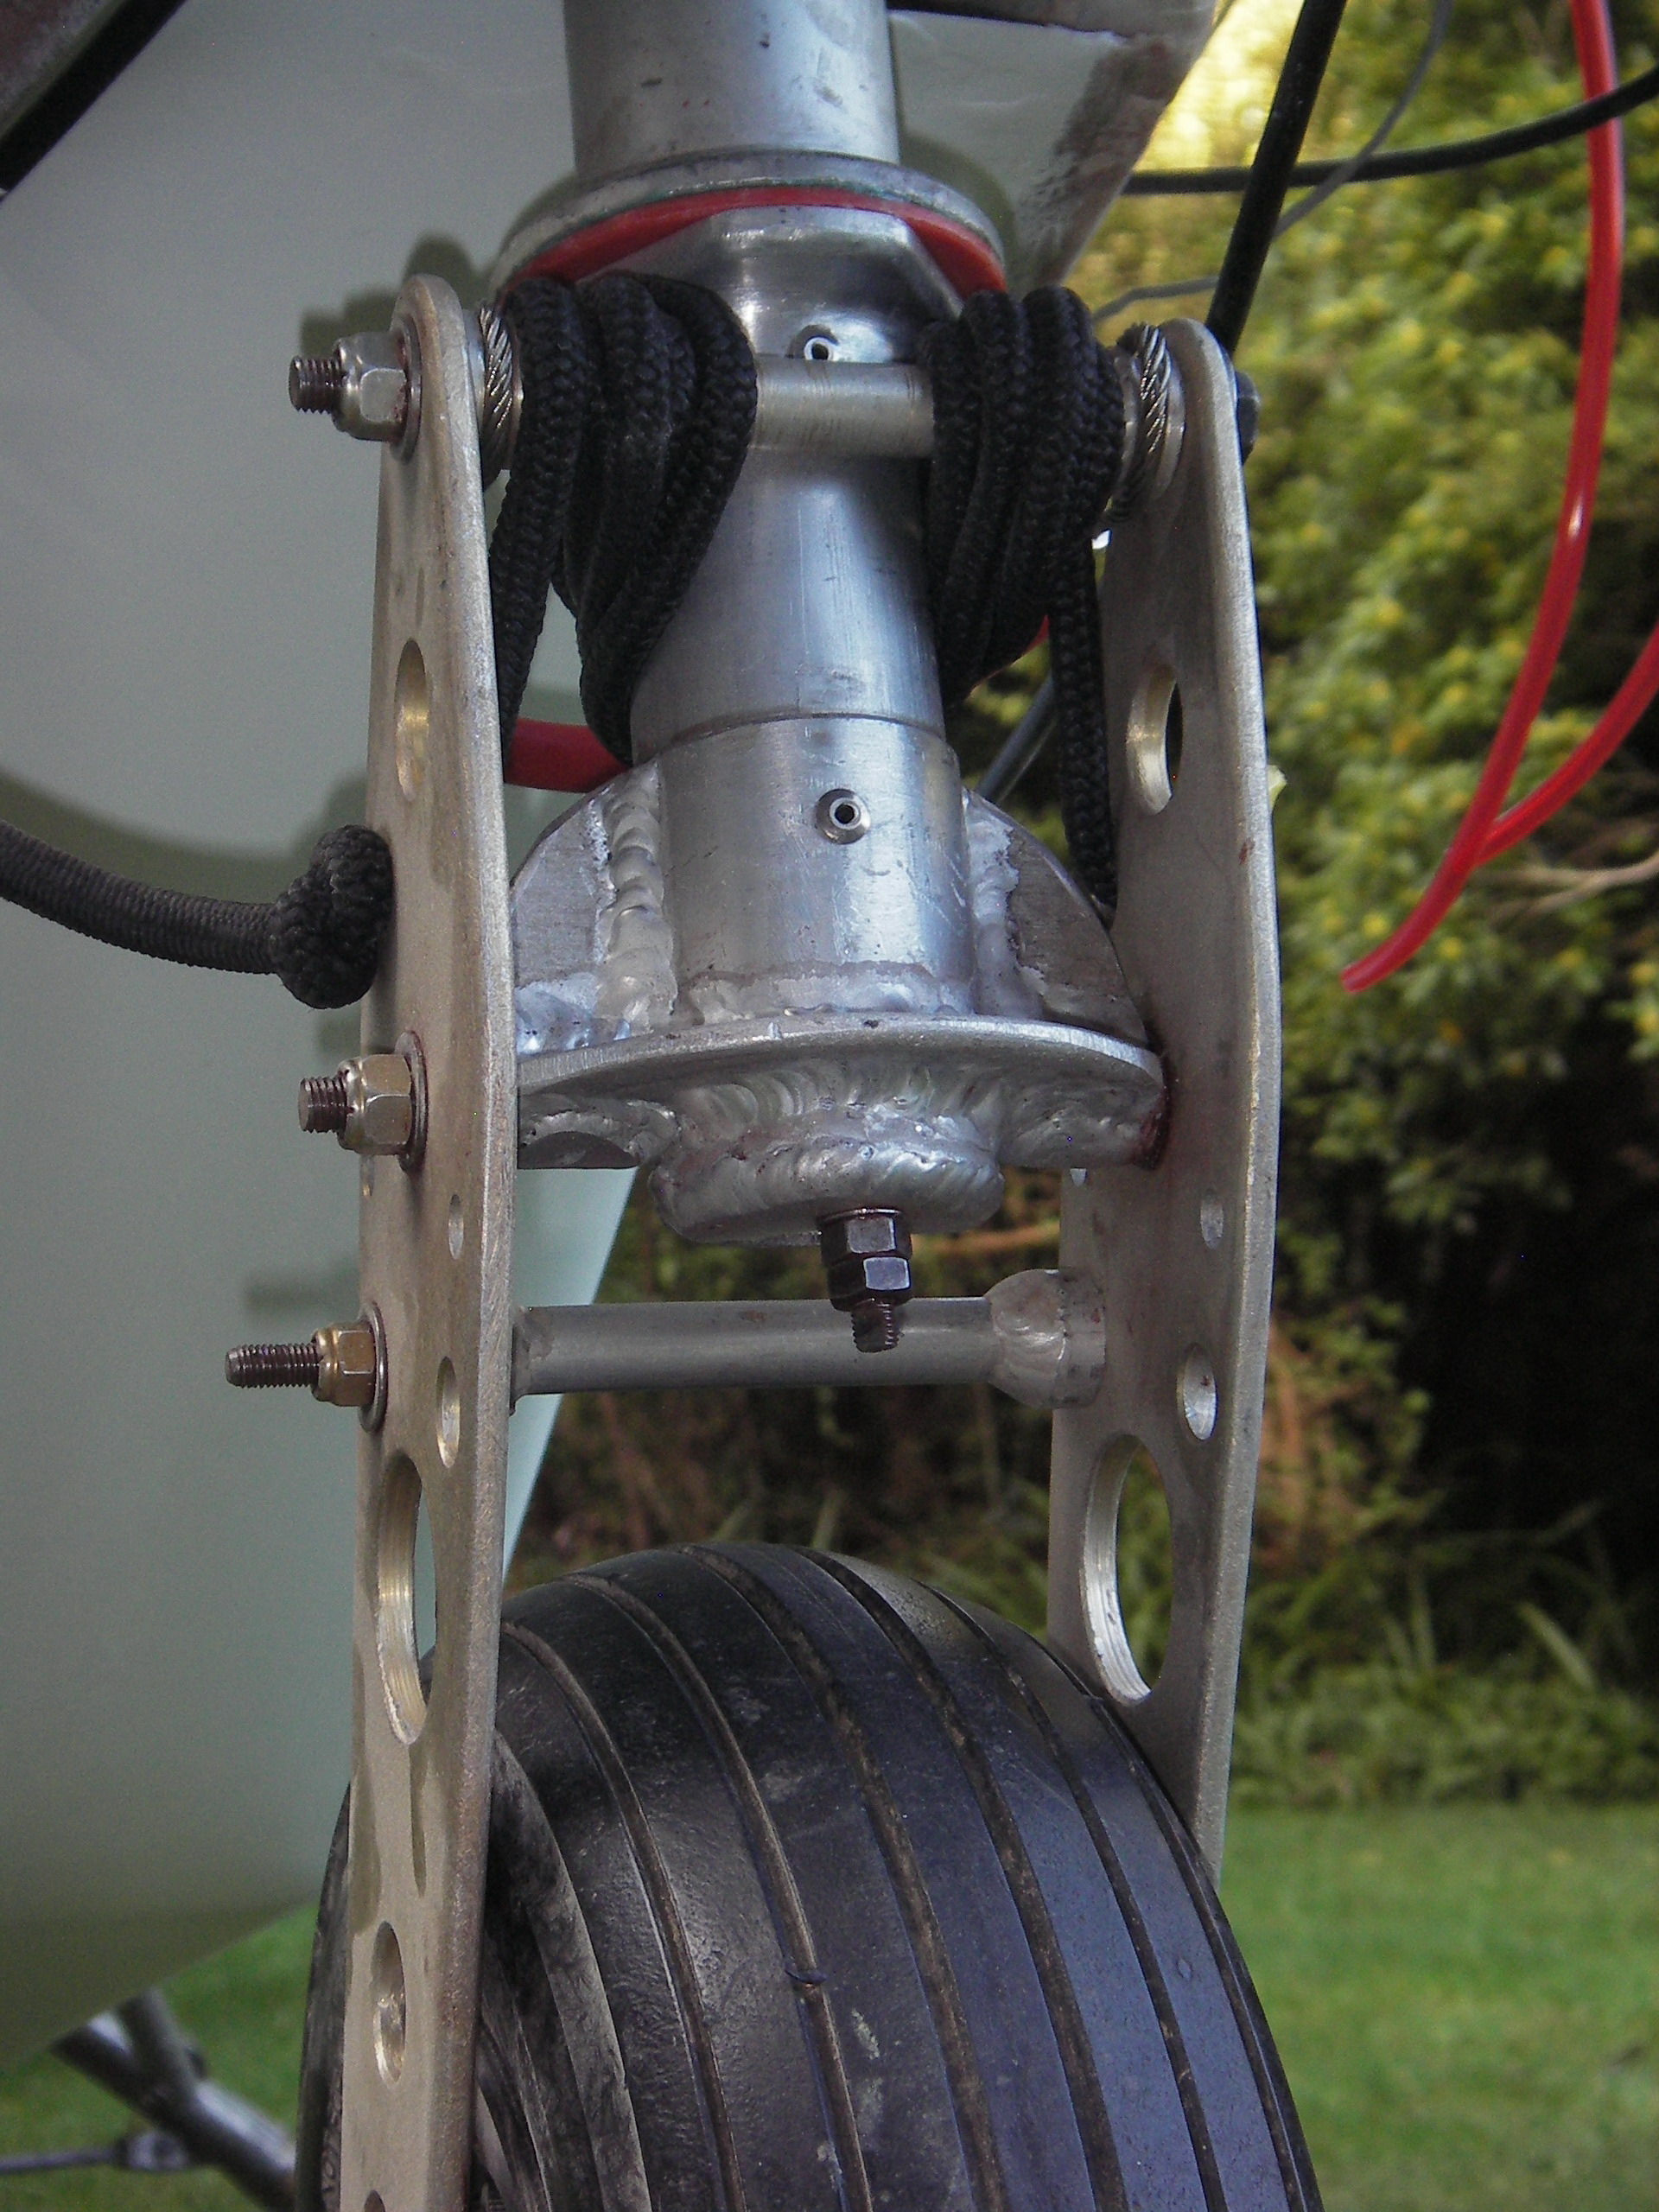
main undercarriage mounted on 40mm fibrelam spacers (to gain more prop clearance)
Main suspension with stronger ‘carry-thru’ (not butt welded) axles and upgraded pultrusion rods (made from Plexinate P-100 polyurethane resin with 73% glass content)upgraded nose-leg with machined spacers, adjustable retaining strop and welded webs (supporting the trailing arm pivot)fuel transfer valve (wing tank to main tank) – 3/8″ bore shifts 28 litres in 10 mins
The tail boom has been fitted into the centre section and the nose cone has been repaired and trimmed to fit around the footwell fairing. Now its time for painting the fuselage.
Recently, I’ve done hours of fibre-glassing, filling and sanding on the fuselage rear footwell and wing centre section to get them reinforced and smooth for painting. Side windows have been cut out (between the front and rear canopies) to widen the pilot’s field of view. An improved fuel transfer system has been fitted, so by twisting a lever the pilot can quickly transfer fuel from the wing tank down to the main tank. The wiring loom, new brake cables, new elevator trim cable and new elevator Teleflex cable have now been threaded into place, and the kevlar sides have now been glued onto the fuselage.
Some of the unexpected tasks were to un-sieze the rudder fin post from the boom, repair broken ribs inside the fin and to replace the fibreglass around the rear boom support cross-member (which had been cut away to give extra tip clearance for the prop). While it was apart, Bruce had the tailplane mounting tubes crack-tested and did the common Shadow upgrade of fitting UHMWPE bushes inside the boom to prevent further wear on these mounting tubes.
In February 2012, Bruce completed urgent repairs to a Shadow C-D from Wanaka. It had been grounded because of excessive wear in the wing-to-fuselage attachments. The job involved completely removing the boom from the centre section, in order to fit new alloy doublers, bush the ovalised holes and replace the wing attachment bolts. The actual repairs were very quick, with most of the labour absorbed in dismantling, re-assembly, covering and painting.
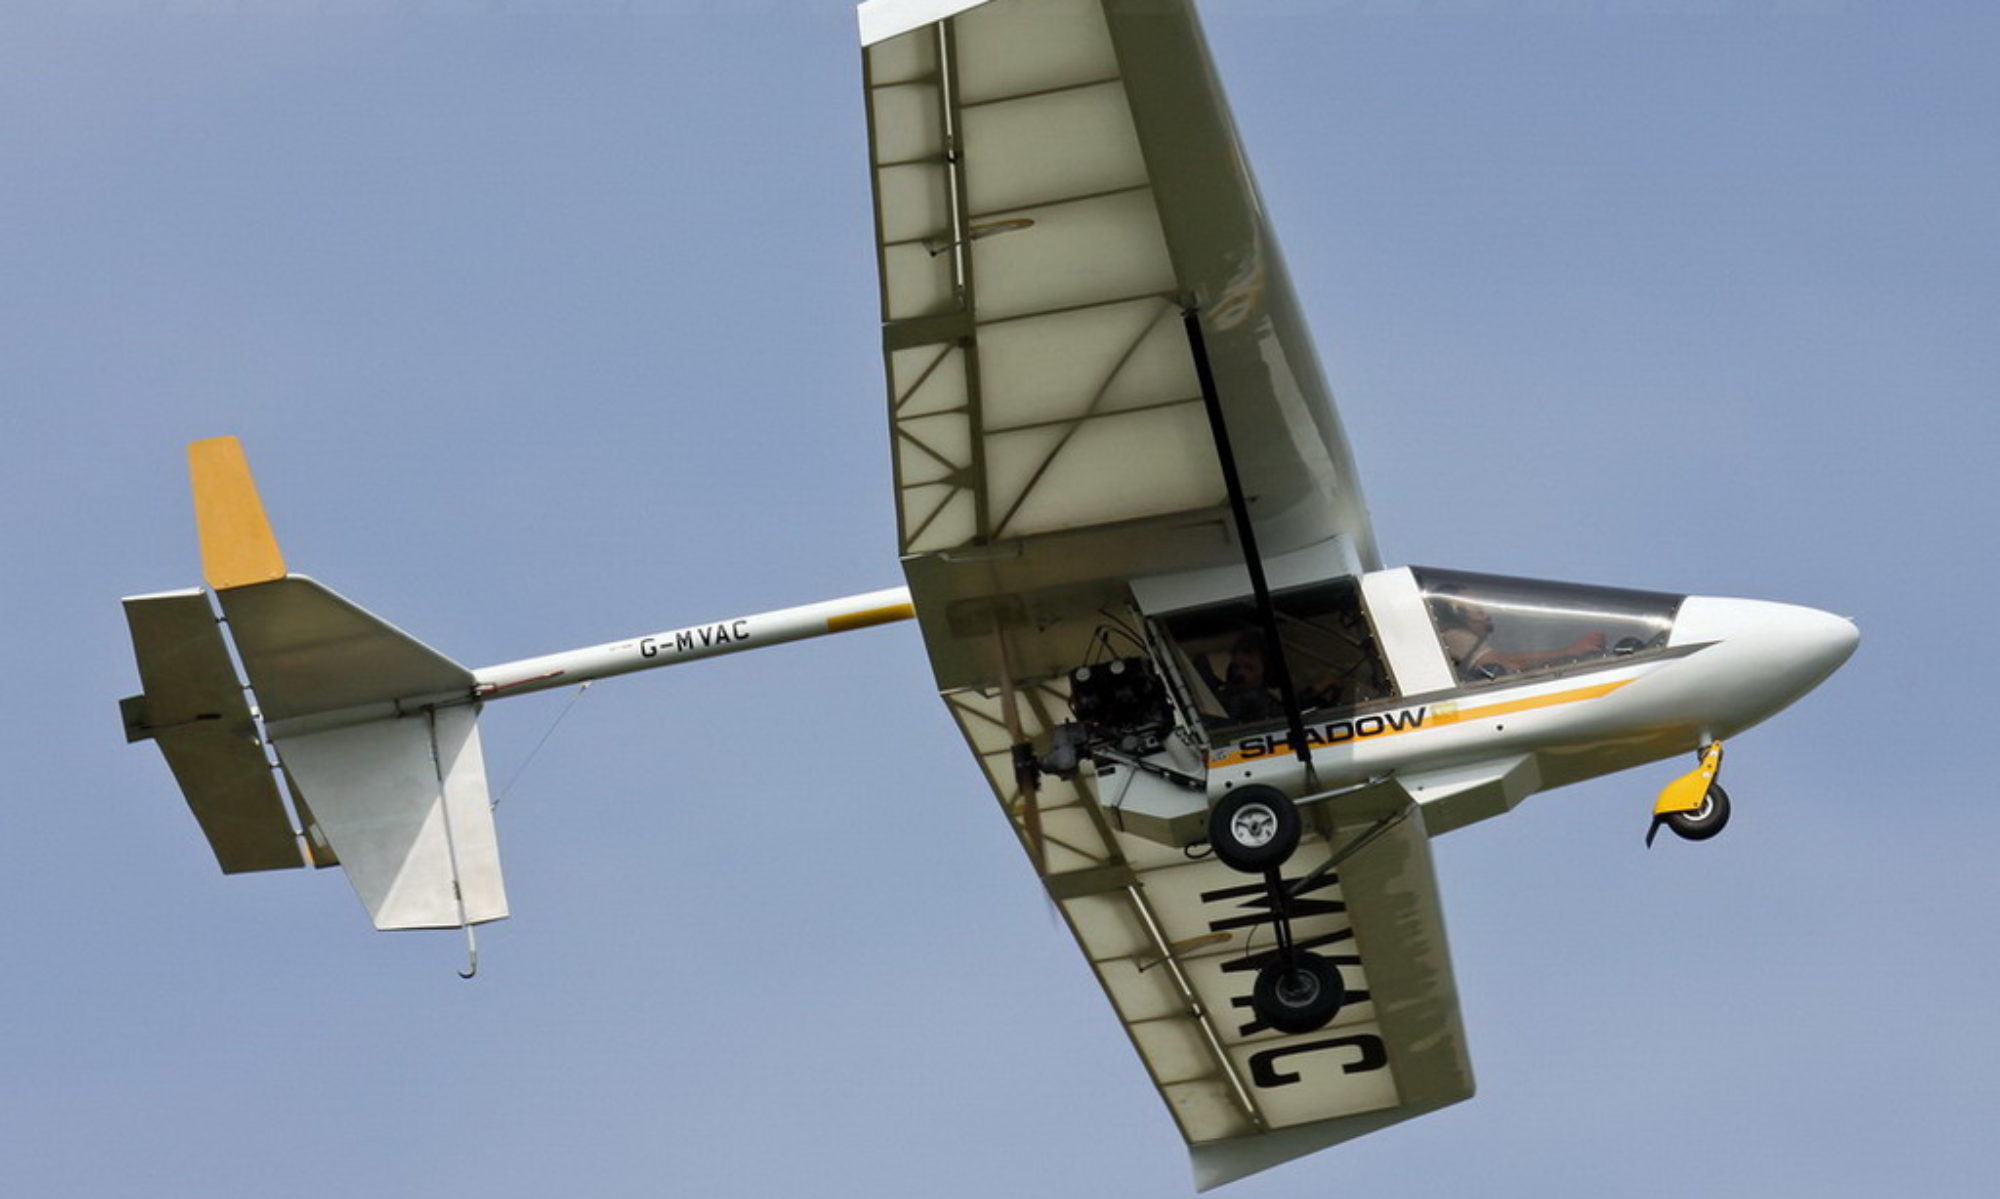
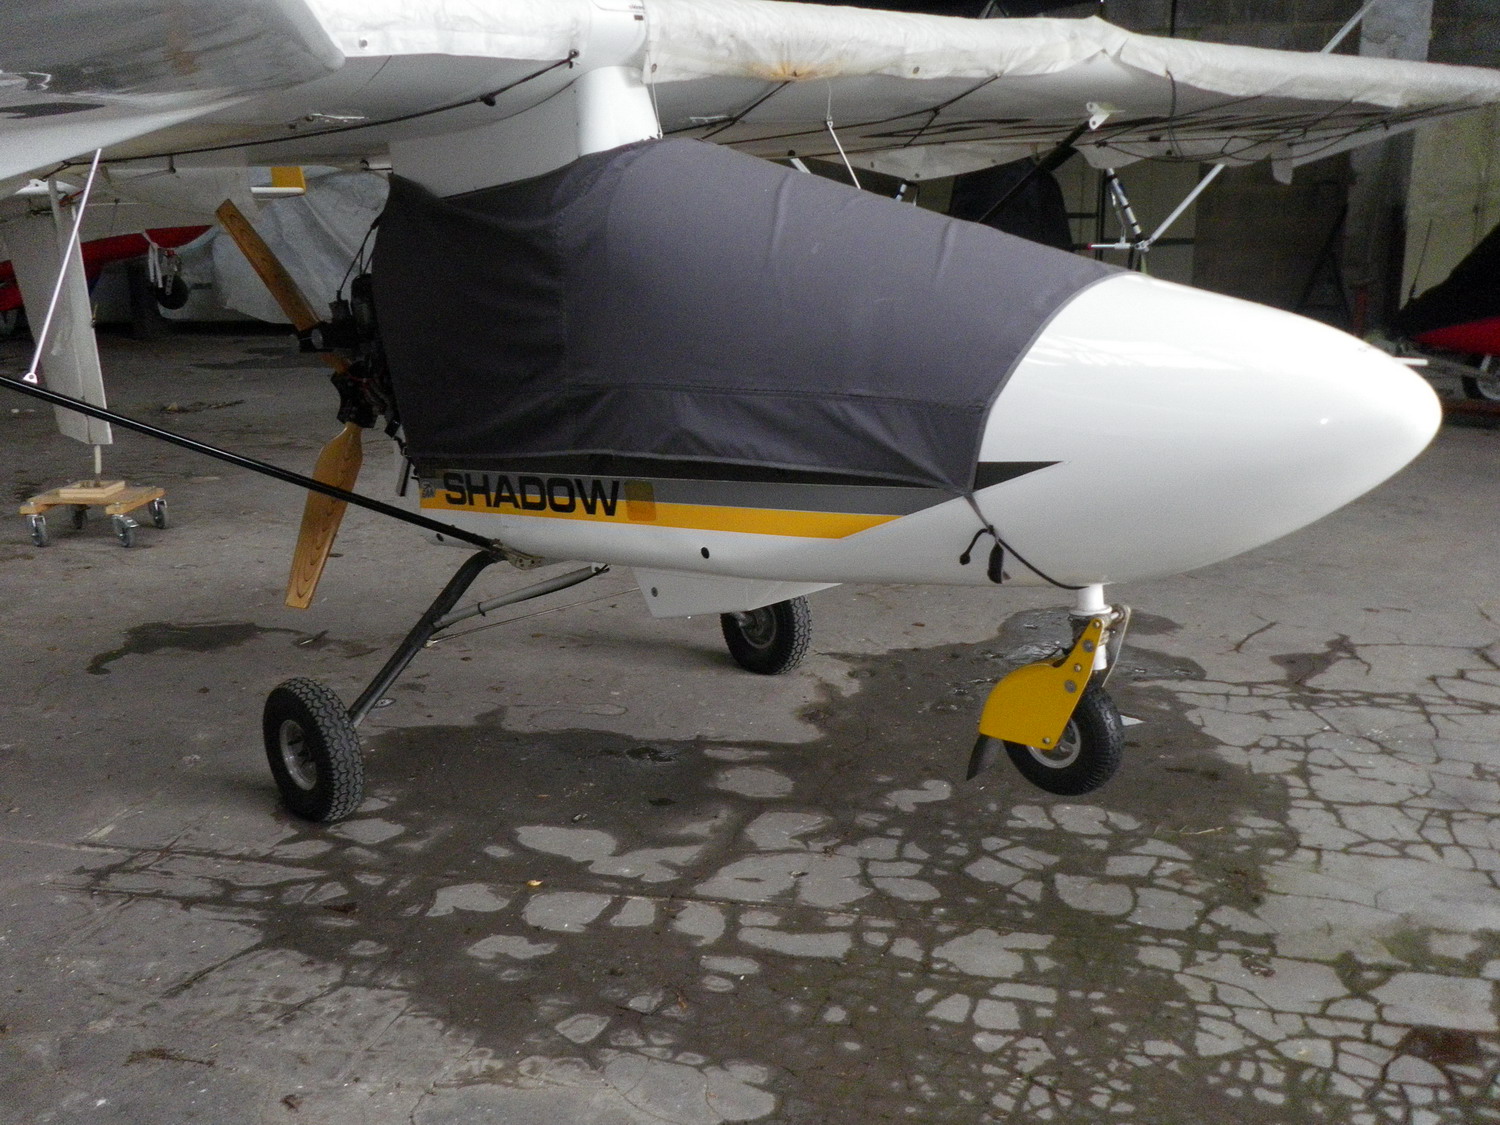 What a surprise? When I was in Shadow Flight Centre’s hangar at Old Sarum airfield, I spotted G-MVAC hiding beneath its covers.